
II. Definitions
- High Midline Venous Catheter (Deep Brachial Vein Line, Antecubital Line)
- Long intravenous catheter (3-8 cm, up to >3 inches and up to 28 cm in some cases)
- Insertion site above the antecubital fossa
- Catheter tip may be in the axillary vein, but does not reach the central circulation (subclavian vein)
III. Indications
- Standard peripheral access difficult (including distal peripheral IV)
- Difficult IV Access (DIVA) occurs in 5-8% of patients
- Alternative to central venous access or PICC Lines when standard peripheral lines are difficult
- Intended use <=6 days (although long midlines have been used up to 30 days in some cases)
- Midline catheters have a far lower infection risk (0.2%) than PICC or Central Lines (2.1 to 2.5%)
IV. Contraindications
- Venous Thromboembolism (active or past history)
- Decreased extremity perfusion
- Chronic Kidney Disease Stage 4-5 (protect vessels for future Hemodialysis shunts)
V. Anatomy: Antecubital fossa venous access sites
- Cephalic Vein (lateral, radial aspect)
- Preferred if accessible (very superficial)
- Often cannulation here has already been attempted by standard peripheral IV techniques without success
- Basilic Vein (medial, ulnar aspect)
- Most common site for Ultrasound-guided antecubital access
- Access site may need to be above antecubital fossa (proximal to confluence of vessels)
- Deep Brachial Vein (midline antecubital)
- Third-line access site if Cephalic Vein and Basilic Vein not accessible
- Adjacent to the deep brachial artery
- Near proximity to the Median Nerve
VI. Precautions: Extravasation Risk
- Extravasation is more common with deep brachial vein IVs (see below)
- Deep Brachial Vein Lines (Midline Venous Catheters) may have a higher rate of Intravenous Contrast extravasation
- Use as long of an intravenous catheter as possible
- Thread as much of the catheter inside the vein
- Use Ultrasound in both in-plane (long axis) and out-of-plane (short axis) to reduce extravasation risk
- Approach the vessel in short axis (out-of-plane)
- Thread the catheter inside the vessel in long axis (in-plane)
- Avoid medications at high risk for extravasation complication via high midlines
- Vesicants (e.g. Chemotherapy)
- Parenteral nutrition
- Medications at the extremes of pH or osmolarity (e.g. 3% saline, Phenytoin)
- References
- Swaminathan and Avila in Herbert (2021) EM:Rap 21(1):7-8
- Hardie (2014) Emerg Radiol 21(3):235-8 [PubMed]
VII. Preparation: Ultrasound cart venous access supplies (per Dr. Dewitz reference)
-
Skin Preparation
- Sterile gauze
- Chux pads
- Chlorhexidine scrub
- Tourniquets
- Tuberculin syringes (25 gauge needle)
- For Lidocaine injection of insertion site (clear syringe of air bubbles)
-
Ultrasound preparation
- Major healthcare groups recommend sterile probe cover AND single-use sterile gel
- American College of Emergency Physicians (ACEP)
- European Society of Radiology Ultrasound Working Group
- American Institute of Ultrasound (AIUM)
- Sterile Ultrasound probe cover (pore size to block 30 nm Hep C, 50 nm HBV, 110 nm HIV)
- Standard Ultrasound probe covers ($7, pore size <30 nm)
- Sterile gloves ($1-2)
- Use only first half of glove, wrapping fingers out of the way
- Condoms ($0.40, pore size 110 nm)
- Blocks HIV, but not HBV or HCV
- Non-sterile glove (with single-use sterile Ultrasound gel)
- Infection rates were similar to standard peripheral IV (5.2 per 1000)
- Adhikari (2010) J Ultrasound Med 29(5): 741-7 +PMID:20427786 [PubMed]
- Avoid Tegaderm
- May damage transducer
- Not designed as probe cover
- However, manufacturer does list as barrier protection against viruses >27 nm
- Sterile gel packets (Ultrasound gel single-use, surgi-lube or similar lubricant)
- Used as Ultrasound acoustic gel and lubricant
- Most infections are due to Ultrasound gel contamination (when single use packs are not used)
- Major healthcare groups recommend sterile probe cover AND single-use sterile gel
- Procedure
- Syringes (10 cc)
- Vascular Access needles
- Long needles are critical (per Dr. Dewitz reference)
- Vein depth >1.5 cm
- Introducing catheter in Central Line kits: 18 gauge, 2.5 inch (6.35 cm)
- Vein depth <1.5 cm
- BD Angiocatheter: 18 gauge, 1.88 inch (4.8 cm)
- Vein depth >1.5 cm
- Standard IV angiocatheters (1.3 inch, 3 cm) are not long enough
- Approximately 3 cm of catheter should be within vessel
- Accessing vessel through skin requires 1-2 cm simply to reach vessel (assuming 45 degree approach)
- Long needles are critical (per Dr. Dewitz reference)
- Dressings
- Venigard catheter holder
- Tegaderm
- Applied to venigard to prevent snagging
- Benzoin
- As needed to hold dressing in place
- Other items to obtain from nurse
- IV Tubing (prefilled with saline)
- Blood draw tubes and appartus needed
- Lidocaine 1% (optional)
- Clear bubbles from syringe (significantly interfere with Ultrasound image)
- Continual line maintenance
- Saline lock (or Heparin lock) with each use and at least once every 24 hours
VIII. Technique: Right Antecubital
- Apply Tourniquet high on arm
- Position patients arm extended, supinated and abducted
- Lay chux under arm
-
Chlorhexidine preparation to antecubital fossa
- Prepare upper arm to antecubital fossa
- Prepare arm to also include a few cm distal to the antecubital fossa
- Prepare Ultrasound
- Ultrasound machine should be on your side of the patient, directly in front of you
- Apply Ultrasound gel to transducer (will be within probe cover and does not need not be sterile)
- Apply probe cover to surface of transducer (scanning head)
- Apply sterile gel on skin for lubrication and acoustic transmission
- Place transducer in transverse (short axis) with indicator facing towards your left (patient's right or 9:00 position)
- Identify optimal vessel for access (see anatomy above)
- Avoid trying to cannulate anything smaller than 3mm diameter (too small)
- Distinguish vein from artery
- Compression may distinguish vein from artery (but unreliable in dehydrated patients)
- Doppler (or color flow) is preferred to distinguish vein from artery
- Determine vessel lie or course
- Follow vessel proximally in short axis (transverse) and then in long axis
- Entry site should be ABOVE the antecubital fossa
- Insertion at the antecubital fossa may result in line kinking with elbow flexion
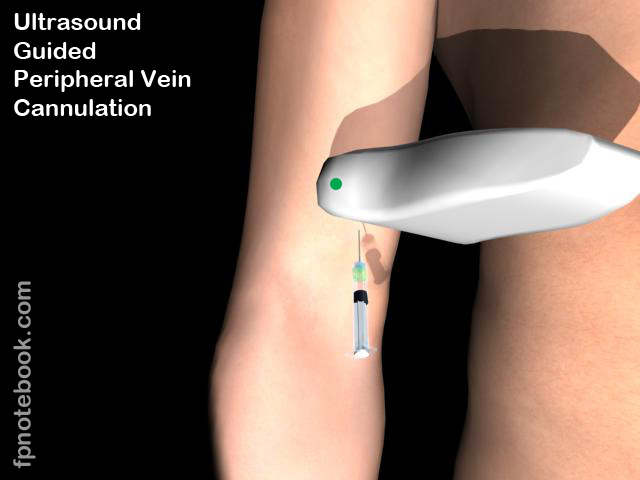
- Images
- Needle preparation
- Choose needle size based on vessel depth (see above)
- Attach 10 cc syringe to needle
- Needle insertion
- Position the transducer such that the target vessel is in the center in the Ultrasound image
- Transducer is in short access with indicator to your left
- Insert the needle at exact midline of transducer
- Transducer should have side marked with exact midline
- Direct the needle at 45 degree angle in line with vessel course (as defined above)
- Bevel should be either up or down
- Follow the needle tip by slowly tilting the transducer towards upper arm
- May advance needle with jack hammer technique (per Dr. Dewitz reference)
- Small ocillations of forward movement enhance the visualization of the needle
- Small foward movements decrease possibility of entering posterior vessel wall
- Aspirate while advancing needle
- Observe needle enter vessel
- On entry, adjust angle to be more shallow (20 degrees) for further needle advancement
- Rotate transducer to long axis
- Advance catheter into lumen under observation
- Hand off Ultrasound transducer for secure placement in Ultrasound cart cupholder
- Position the transducer such that the target vessel is in the center in the Ultrasound image
- Procedure completion
- Needle removal
- Hold pressure over the proximal vessel while withdrawing needle (prevents bleeding)
- Hold the catheter hub to prevent withdrawing from vessel
- Apply IV extension tubing
- Clean and completely Dry Skin
- Chlorhexidine can help remove the surgilube
- Secure IV
- Apply IV catheter clear dressing (e.g. Veni-gard)
- Apply Tegaderm over Veni-Gard to prevent snagging
- Clean transducer
- Remove Ultrasound probe cover
- Apply probe disinfectant (e.g. T-Spray or gray-topped Alcohol-free germacidal wipes)
- Needle removal
IX. References
- (2026) Presc Ins 33(3): 8-9
- Dewitz (2012) Ultrasound-Guided Vascular Access Video, GulfCoast Ultrasound, VL-90-UGVAHD
- Goldstein (2006) Ultrasound Guided Peripheral Access
- Lin and Mirsch in Herbert (2019) EM: Rap 19(1): 9-10
- Rutherford (2025) Alternative Vascular Access, Hospital Procedures Course
- Adams (2016) J Emerg Med 51(3):252-8 +PMID: 27397766 [PubMed]
- Keyes (1999) Ann Emerg Med 34(6):711-714 [PubMed]
- Riley (2012) Crit Ultrasound J 4(1): 3 [PubMed]
- Spiegel (2020) Ann Emerg Med 75(4):538-45 [PubMed]